Here we’ll learn how to add GPS locations to photos which didn’t get geotagged. Even if you have the Camera app set to geotag your photos (Settings app -> Privacy -> Location Services), sometimes your location can’t be determined at the time, so a GPS location is not added to the photo metadata. It can be very useful to add or edit the geotag, as shown below using the Photo Investigator iOS app.
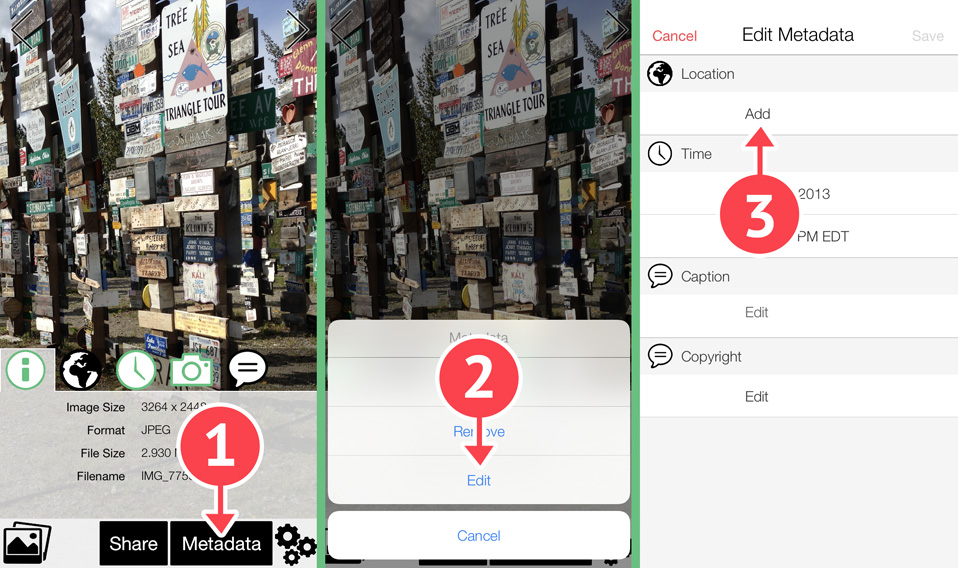
The first step will be to select a photo in the app, and then navigate to the “Edit Location” screen. Note that you can also add a caption, timestamp, and copyright information into the metadata.
Choosing the Geotag Location
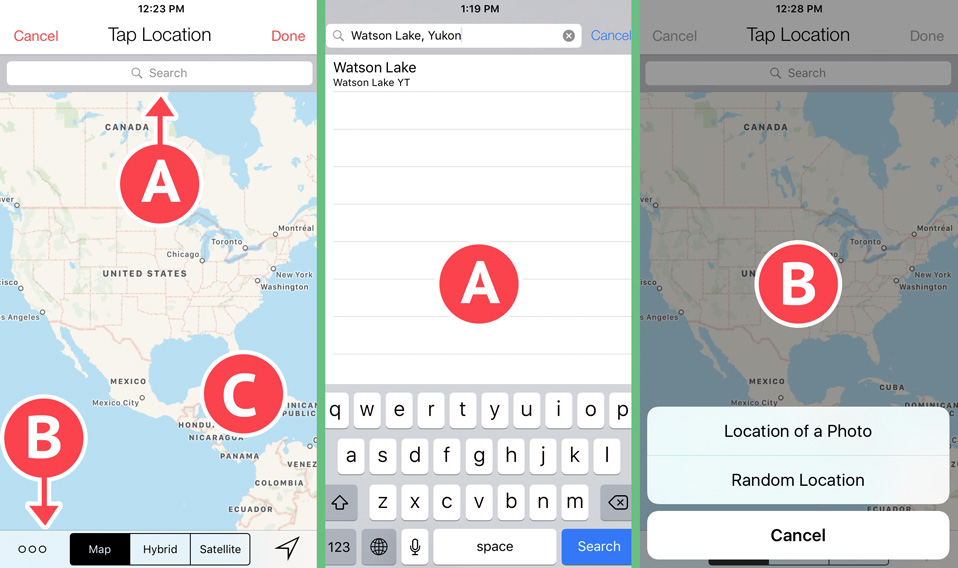
The second step is to choose the location for the photo’s geotag. This can be done in four ways:
- (A) Search for a location,
- (B1) Choose another photo to take its location,
- (B2) Select a random location, or
- (C) Tap anywhere on the map.
You can also locate yourself on the map, and see the satellite view, if that helps.
Saving the Edited Copy
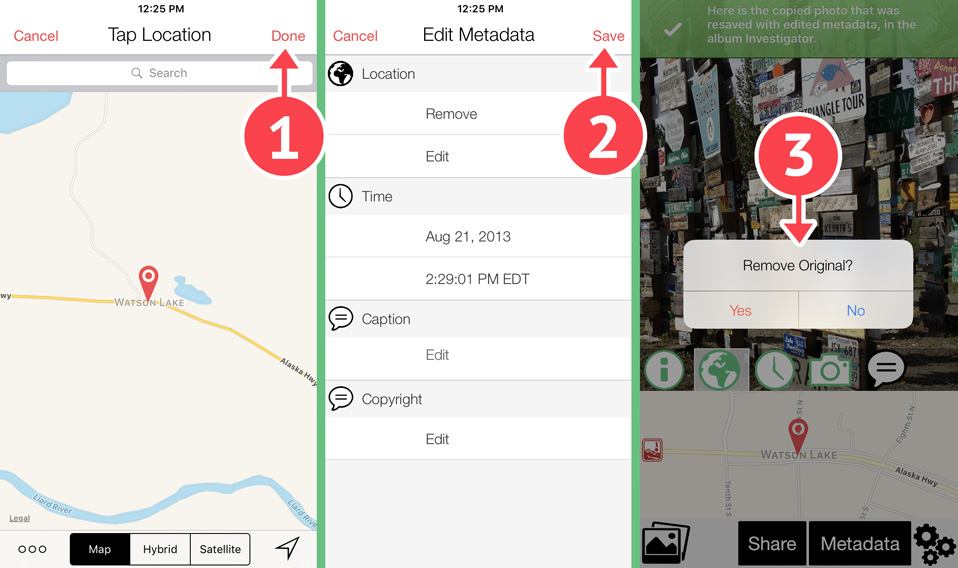
The final step is saving the edited photo. To do this, tap “Done” and then “Save.” After the photo has been re-saved with edited photo metadata, the app will ask if you’d like to delete the original version of the photo. Don’t worry, the quality of the photo has been preserved, and I recommend removing the original. In any event, it will be in the album “Recently Deleted” for 30 days afterward. The edited photo will appear at the end of the Camera Roll, or you can find it in the album “Investigator.”
Cheers,
The Photo Investigator
The Photo Investigator App makes viewing, editing, removing and sending photo metadata easy. Photo and video metadata may include location (if enabled by the camera), date, device, software versions, file size, file name, an “iOS Metadata” section, and many more metadata items. more. Users can view and share DEPTH MAPS by selecting a portrait photo and tapping “Portrait”.

